The Progress → Stats → 100% Completion screen only opens after the end credits, but everything you did before them already counts. The list has 35 items: story, robberies, fencing stolen goods, collectibles, activities, stunts and discoveries. 100% unlocks the gold trophy A Long Road, which you need for the platinum Vice Got a Price! More in the trophy guide.
Every location for 100% is on our GTA 6 Map with the "For 100%" filter. Mark what you find and the Map tracks your progress. In the tables below, the "On the map" link under each item opens the Map with just that layer.
Where to Start
100% is easier to chip away at during the story than after it:
- scan every new vehicle and study every new animal through binoculars from the start; most of it fills up by itself;
- take optional missions as they appear: they count toward the 100 tasks;
- rob operations, banks and stores as they unlock;
- leave Challenges for last and skip the ten longest ones.
Story and Missions
| Item | What to know | |
|---|---|---|
 | Story Need: finish the story | Finish every main mission; the 100% list opens after the credits. |
 | Optional Tasks Need: 100 tasks | Moses and Randy's errands, Tyrone's labs, fishing and Strangers and Freaks count: you usually reach 100 just by playing. |
Robberies
| Item | What to know | |
|---|---|---|
 | Illegal Operations (Gang Operations) Need: all 39 On the map → | Grab all key valuables in one visit; 19 locations unlock as the story goes on. |
 | Banks (Bank Jobs) Need: all 22 On the map → | Unlock after the Credit Check mission in Chapter 3; in small banks take the till and the safe. |
 | Payday Loans (Payday Loan Jobs) Need: all 7 On the map → | Unlock together with banks; the cash is on the counter and in the back-room safe. |
 | Smash 'n' Grabs Need: 34 of 35 On the map → | Pawn shops unlock in Chapter 2, jewelry stores in Chapter 3; skip the back-room safe and the robbery may not count. |
 | Stick Ups Need: 50 of 91 | Quick robberies of convenience stores, diners and liquor stores. |
 | Vaults Need: all 8 | One in each big bank. They unlock with the optional mission That's Where The Money Is in Chapter 4, which is easy to miss: follow an armored van to a bank and get in while the vault is open. After that, Yasmani sells van tips for $10,000. A vault job gives you 4 stars, so bring your partner and hand them a full bag. |
Fencing Stolen Goods
| Item | What to know | |
|---|---|---|
 | Narcotics Fenced Need: $100,000 On the map → | Most of the product comes from Illegal Operations and cocaine flamingos. |
| Jewelry Fenced Need: $100,000 On the map → | From display cases and safes in jewelry stores. |
| Marked Bills Fenced Need: $250,000 On the map → | From banks and payday loans; you need the Dye Pack Jammer from the Credit Check mission. |
| Vehicles Fenced Need: $200,000 On the map → | From Chapter 2 Moses in Port Gellhorn takes cars without trackers; from Chapter 3 any Pay 'n' Spray takes cars with standard trackers. Randy's Wish List orders in Chapter 3 are the fastest. |
Collectibles
| Item | What to know | |
|---|---|---|
 | Treasures (Kenton Sets) Need: 5 of 7 sets On the map → | Kenton calls after the Island Dreams mission in Chapter 1; his KR icon is on Key Lento. He then disappears and comes back between Chapters 2 and 3. 5 sets are enough for this item, but Underwater Discoveries only completes after all 7. Not every spot is on the Map yet. |
 | Collectible Cards (Collectible Card Sets) Need: 15 of 18 sets On the map → | 480 cards in 18 sets; the same card can turn up in several places. |
 | Waink (WAiNK Locations Scanned) Need: 100 locations On the map → | Scan on foot when the game tells you a spot is nearby. |
 | Underwater Discoveries Need: all 33 | Completes itself once you collect all 7 Kenton treasure sets. |
 | Magazines and Book Swaps (Magazines, Books & Comics) Need: 30 of 34 On the map → | 27 magazines, books and comics plus 7 book swaps; only different issues count. |
 | Meditation Spots Need: 15 of 18 | 10 spots; at 8 of them Jason and Lucia can meditate together. Call your partner and the spot counts twice. |
 | Cocaine Flamingos Need: 100 of 125 | Only shoot flamingos with a black-and-white beak: yellow-and-black ones are just decoration. |
 | Unique Playlists Need: both On the map → | Unlock when you scan the right posters. |
 | Styles (Discovered Styles) Need: 70 of 79 | 13 tattoos for Jason, 15 for Lucia, 17 magazine tattoos and 34 luxury watches. |
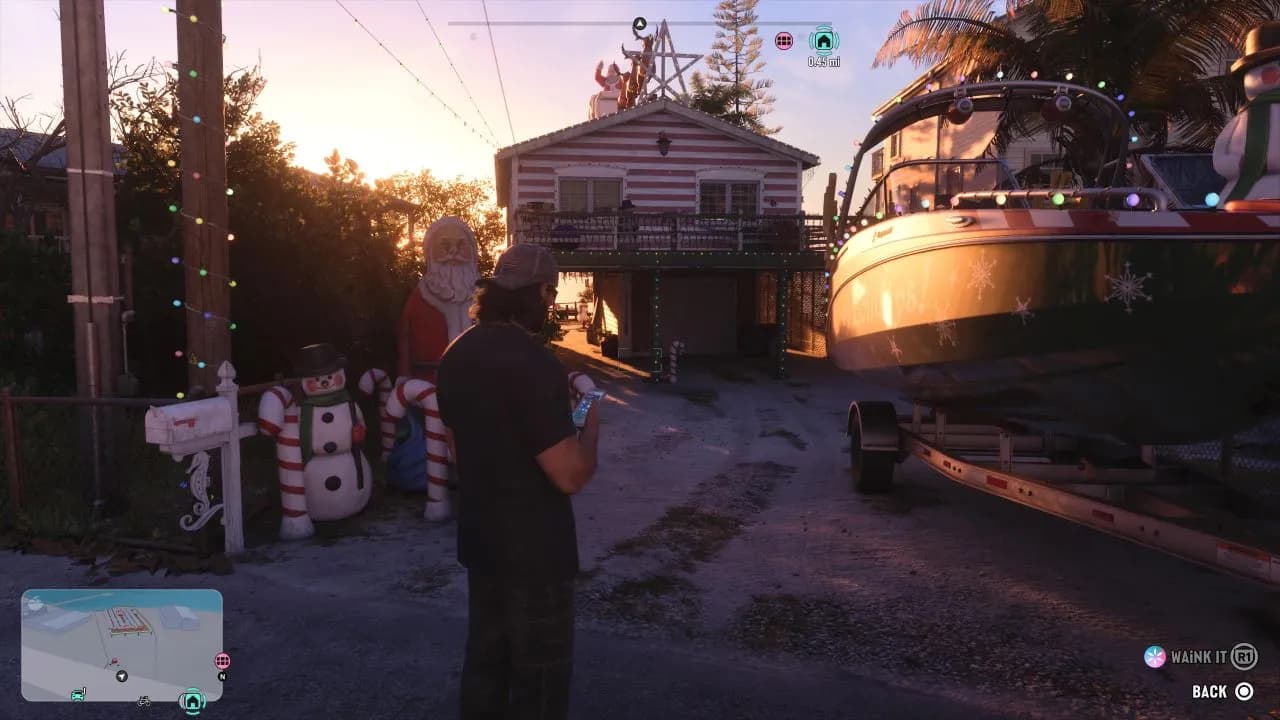
This is a WAiNK spot: walk up to it and take the photo when the "WAiNK it" prompt appears in the bottom right. Screenshots here and below: GTABase.
Races and Activities
| Item | What to know | |
|---|---|---|
 | Races (Unique Races) Need: 30 of 40 wins On the map → | The race icon shows up on the in-game map when you are about 100 meters from the start. |
| Race Challenges Need: 10 of 13 gold medals | The ten easiest ones are enough. |
 | Shooting Ranges Need: all 42 gold medals On the map → | There are two ranges: Griffin (18 gold medals) and Rodgers Ranch (24). Buy the $5 Waiver Pass from the clerk, or the challenges won't appear. |
 | Video Games Need: all 4 | Just start each game and quit. Bang For Your Buck is on arcade cabinets, the other three are on the TV at home, which is unavailable for part of Chapter 2. |
 | Pool (Pool Opponents) Need: 5 of 7 opponents On the map → | Opponents wait in bars, taverns and cafés. |
 | Mini Golf Need: 2 of 3 On the map → | Full-size golf courses don't count. |
 | Basketball (Basketball Hoops) Need: 90 of 100 hoops On the map → | Score in 90 different hoops; a second basket in the same hoop doesn't count. |
 | Drone Races (Drone Time Trials) Need: all 42 On the map → | 14 locations with 3 runs each: beat the target time in the first two, just finish the third. |
Stunts and Challenges
| Item | What to know | |
|---|---|---|
 | Stunts Need: 300 of 397 On the map → | 130 stunt jumps, 202 Under the Bridge, 40 Knife Flights and 25 BASE jumps; Under the Bridge is the fastest to farm. |
 | Challenges Need: 70 of 80 | 8 categories of 10 challenges; leave them for last and skip the longest ones. |
 | Bret's Target Decks Need: all 15 | Jason only. After the Coffee Break mission in Chapter 2, Bret texts you the first task, Veteran Hunted. Pick up his Killtelligence SM-69 rifle from the locker in any Ammu-Nation. A clean head or heart shot pays more. |
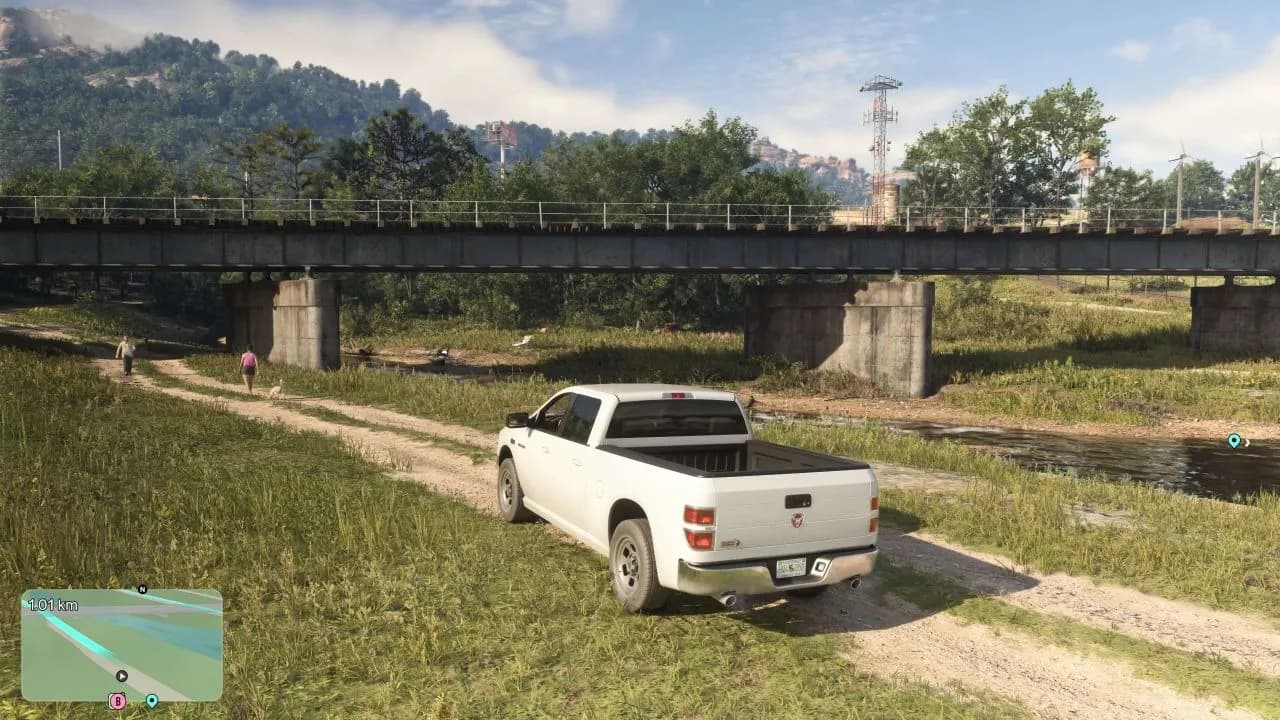
One of the 202 Under the Bridge spots: the railroad bridge over the Kalaga River.
Discoveries
| Item | What to know | |
|---|---|---|
 | Base Model Vehicles Need: 200 of 277 | Scan traffic on busy roads; Standout Vehicles don't count. |
 | Standard Issue Weapons Need: 50 of 66 | Holding each weapon once is enough. |
 | Animals Studied Need: 100 of 255 | Study them through binoculars; every dog and cat breed counts separately. |
What You Can Miss
You can't lose a 100% item for good: free roam stays open after the ending. But finished missions can't be replayed, so one-off items inside the story are gone.
- Jason's house, Chapter 1. The balcony meditation with Lucia is gone once the chapter ends, and so are the magazines and books in the house, though the same issues turn up elsewhere. You have some slack: 15 of 18 meditations and 30 of 34 magazines are enough.
- Chapter 2 finale, Checking Out. After this mission the pool opponent at Delights is gone until the club reopens. Beat him before the chapter ends.
- Illegal Operations. Missed valuables take a long time to respawn, so clear each one in a single visit.
Make a manual save before every chapter finale.
Collection Rewards
Some items unlock cheat codes. Cheats only work after the story, and while they are on, trophies and saving are disabled.
- 50 stunt jumps: Unlimited Nitrous.
- 50 cocaine flamingos: Inflatable Flamingo.
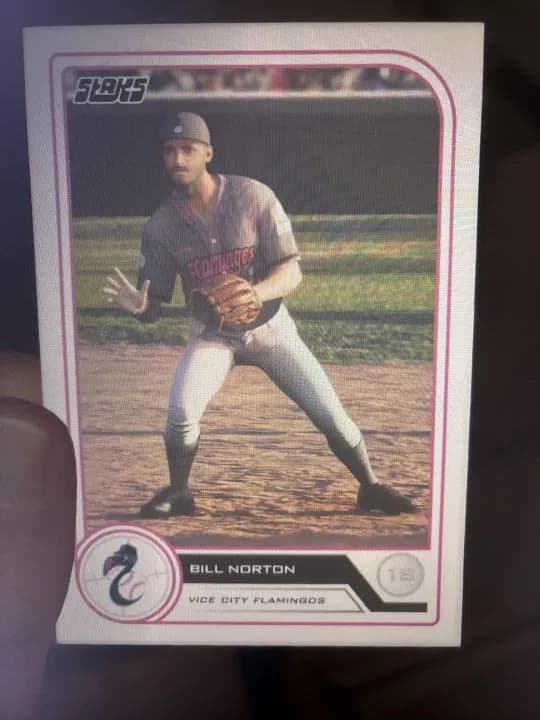
- Every card in the Vice City Flamingos set: the Bubblegum filter.
- 10 and 20 collectible watches from Styles: Move Time Forward and Pause Time of Day.
- All challenges: Hauners P-996 Lazer.
Pictured: the Bill Norton card from the Vice City Flamingos set, which has 24 cards.
Useful Links
Collectibles are spread across the whole state, so fast travel saves a lot of time. PS5 and Xbox button layouts are in the controls guide.